Zwift Review
Zwift is an immersive online game and training platform for cyclists and runners.
The Zwift app initially gained popularity within the cycling community, enabling cyclists to ride with friends or strangers, even during the winter months. It also supports runners using treadmills, and all activity is stored in the user's profile.
Once your avatar enters the Zwift environment, you'll find yourself in a world populated by runners and cyclists from around the globe. The app offers immersive virtual worlds for both running and cycling and allows users to train in environments like Watopia, London, and New York. The app provides customisable workouts, structured training plans, and group events, allowing users to compete or collaborate with a global community in real-time. Zwift tracks key performance metrics such as speed, distance, cadence, and heart rate and synchronises with smart cycling machines, treadmills, and heart rate monitors. It’s available across multiple platforms including PCs, smartphones, tablets, and some Smart TVs. It integrates with popular fitness platforms like Strava and Garmin.
Whether you’re a beginner or an advanced athlete, Zwift provides in-game challenges, leaderboards, and events to keep you accountable and competitive.
Pros and Cons
- Pro: Immersive Virtual Worlds: Makes indoor workouts more engaging with interactive and scenic virtual environments.
- Pro: Motivating Social Component: Connects users to a global community of runners and cyclists for real-time interaction and competition.
- Pro: Structured Workouts and Training Plans: Offers guided workouts, training plans, and classes for various fitness levels and goals.
- Pro: Integration with Fitness Platforms: Syncs easily with apps like Strava, Garmin, and TrainingPeaks for data consolidation.
- Pro: Group Events and Races: Offers regular community-organised races, events, and group workouts to keep things fresh and competitive.
- Con: Graphics and Tech Limitations on Older Devices: The app's performance and graphics may not be as smooth on older devices, affecting the overall experience.
- Con: Subscription Cost for Cycling (but free for treadmills): Zwift requires a monthly subscription fee, which might be a deterrent for some users.
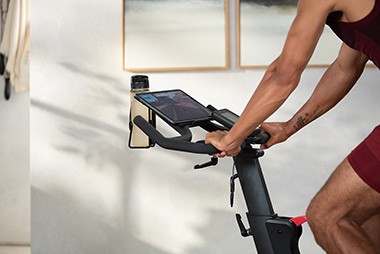
Seamless integration with JTX Fitness treadmills
Smart treadmills have built-in connectivity that sends your workout in real-time to the app. This makes attaching a running pod to your trainer unnecessary and provides more consistent results. Connecting your treadmill to the Zwift app is easy and you should only need to do it once.
How to connect Zwift to your JTX Fitness treadmill
- Power up your JTX treadmill.
- Launch the Zwift app on your device.
- Sign in to the app or create an account if you have never used Zwift before.
- Select USER.
- Select RUN then RUN SPEED. A pop-up box will appear with a list of connectable devices. Your treadmill will start with iConsole.
- Select your machine from the list then select OK.
- Select LET’S GO.
You are connected. From the home screen, you can select your workout or join an event. Once you’ve found your feet you’ll want to know more. Links on how to dive deeper into Zwift can be found on their quick start guide.
Connect your smart compatible JTX cycling machine to Zwift
The JTX Racer-M and JTX Studio V5 will connect directly with the Zwift app without needing to attach a different device to your machine.
- Launch the Zwift app on your device.
- Sign in to the app or create an account if you have never used Zwift before.
- Select RIDE and then POWER SOURCE.
- Begin pedalling. A pop-up box will appear with a list of connectable devices. Your treadmill will start with iConsole.
- Select your machine from the list then select OK.
- Select LET’S GO.
You are connected. From the home screen, you can select your workout or join an event.


